Portable Computing Setup
I know from experience that if I use a laptop keyboard for any length of time, I will be forced to do voice coding for months while the RSI heals.
Therefore I don’t own a laptop. For the past five years this has meant I’m chained to my desk if I want to do any coding or computing (though a tablet and pencil have been my go-to for non-typing tasks such as easy web browsing).
This never really bothered me; I’m not the type to go out to coffee shops and when I’m travelling, I want to be travelling, not coding, so leaving the computer at home isn’t a problem. I grew up with the idea that computers stay on desks; I didn’t buy my first laptop until I was in my mid twenties.
However, I found that I wasn’t doing as much hobby coding. Partly this was because I work from home and my desk monitors are plugged into my work machine (which is a laptop; I just don’t use it as such), but a lot of it was that I’m sick of being at my desk by the end of the day and would rather hang out in the living room with my wife, even if we’re both just ignoring each other coding on different project!
So as my last-of-the-Intels iMac Pro started to feel its age I decided to investigate a more portable setup. I imagined a lapdesk I could set my keyboard on and have some kind of monitor connected to a computer.
To prove out the idea, I realized I can use my ipad as a “some kind of monitor”. I grabbed an iPad tripod adapter (disclosure: that is a referral link, as are some of the others in this article, so I might get a couple bucks back) and after a couple days shipping and an hour in the woodshop I had a prototype set up:
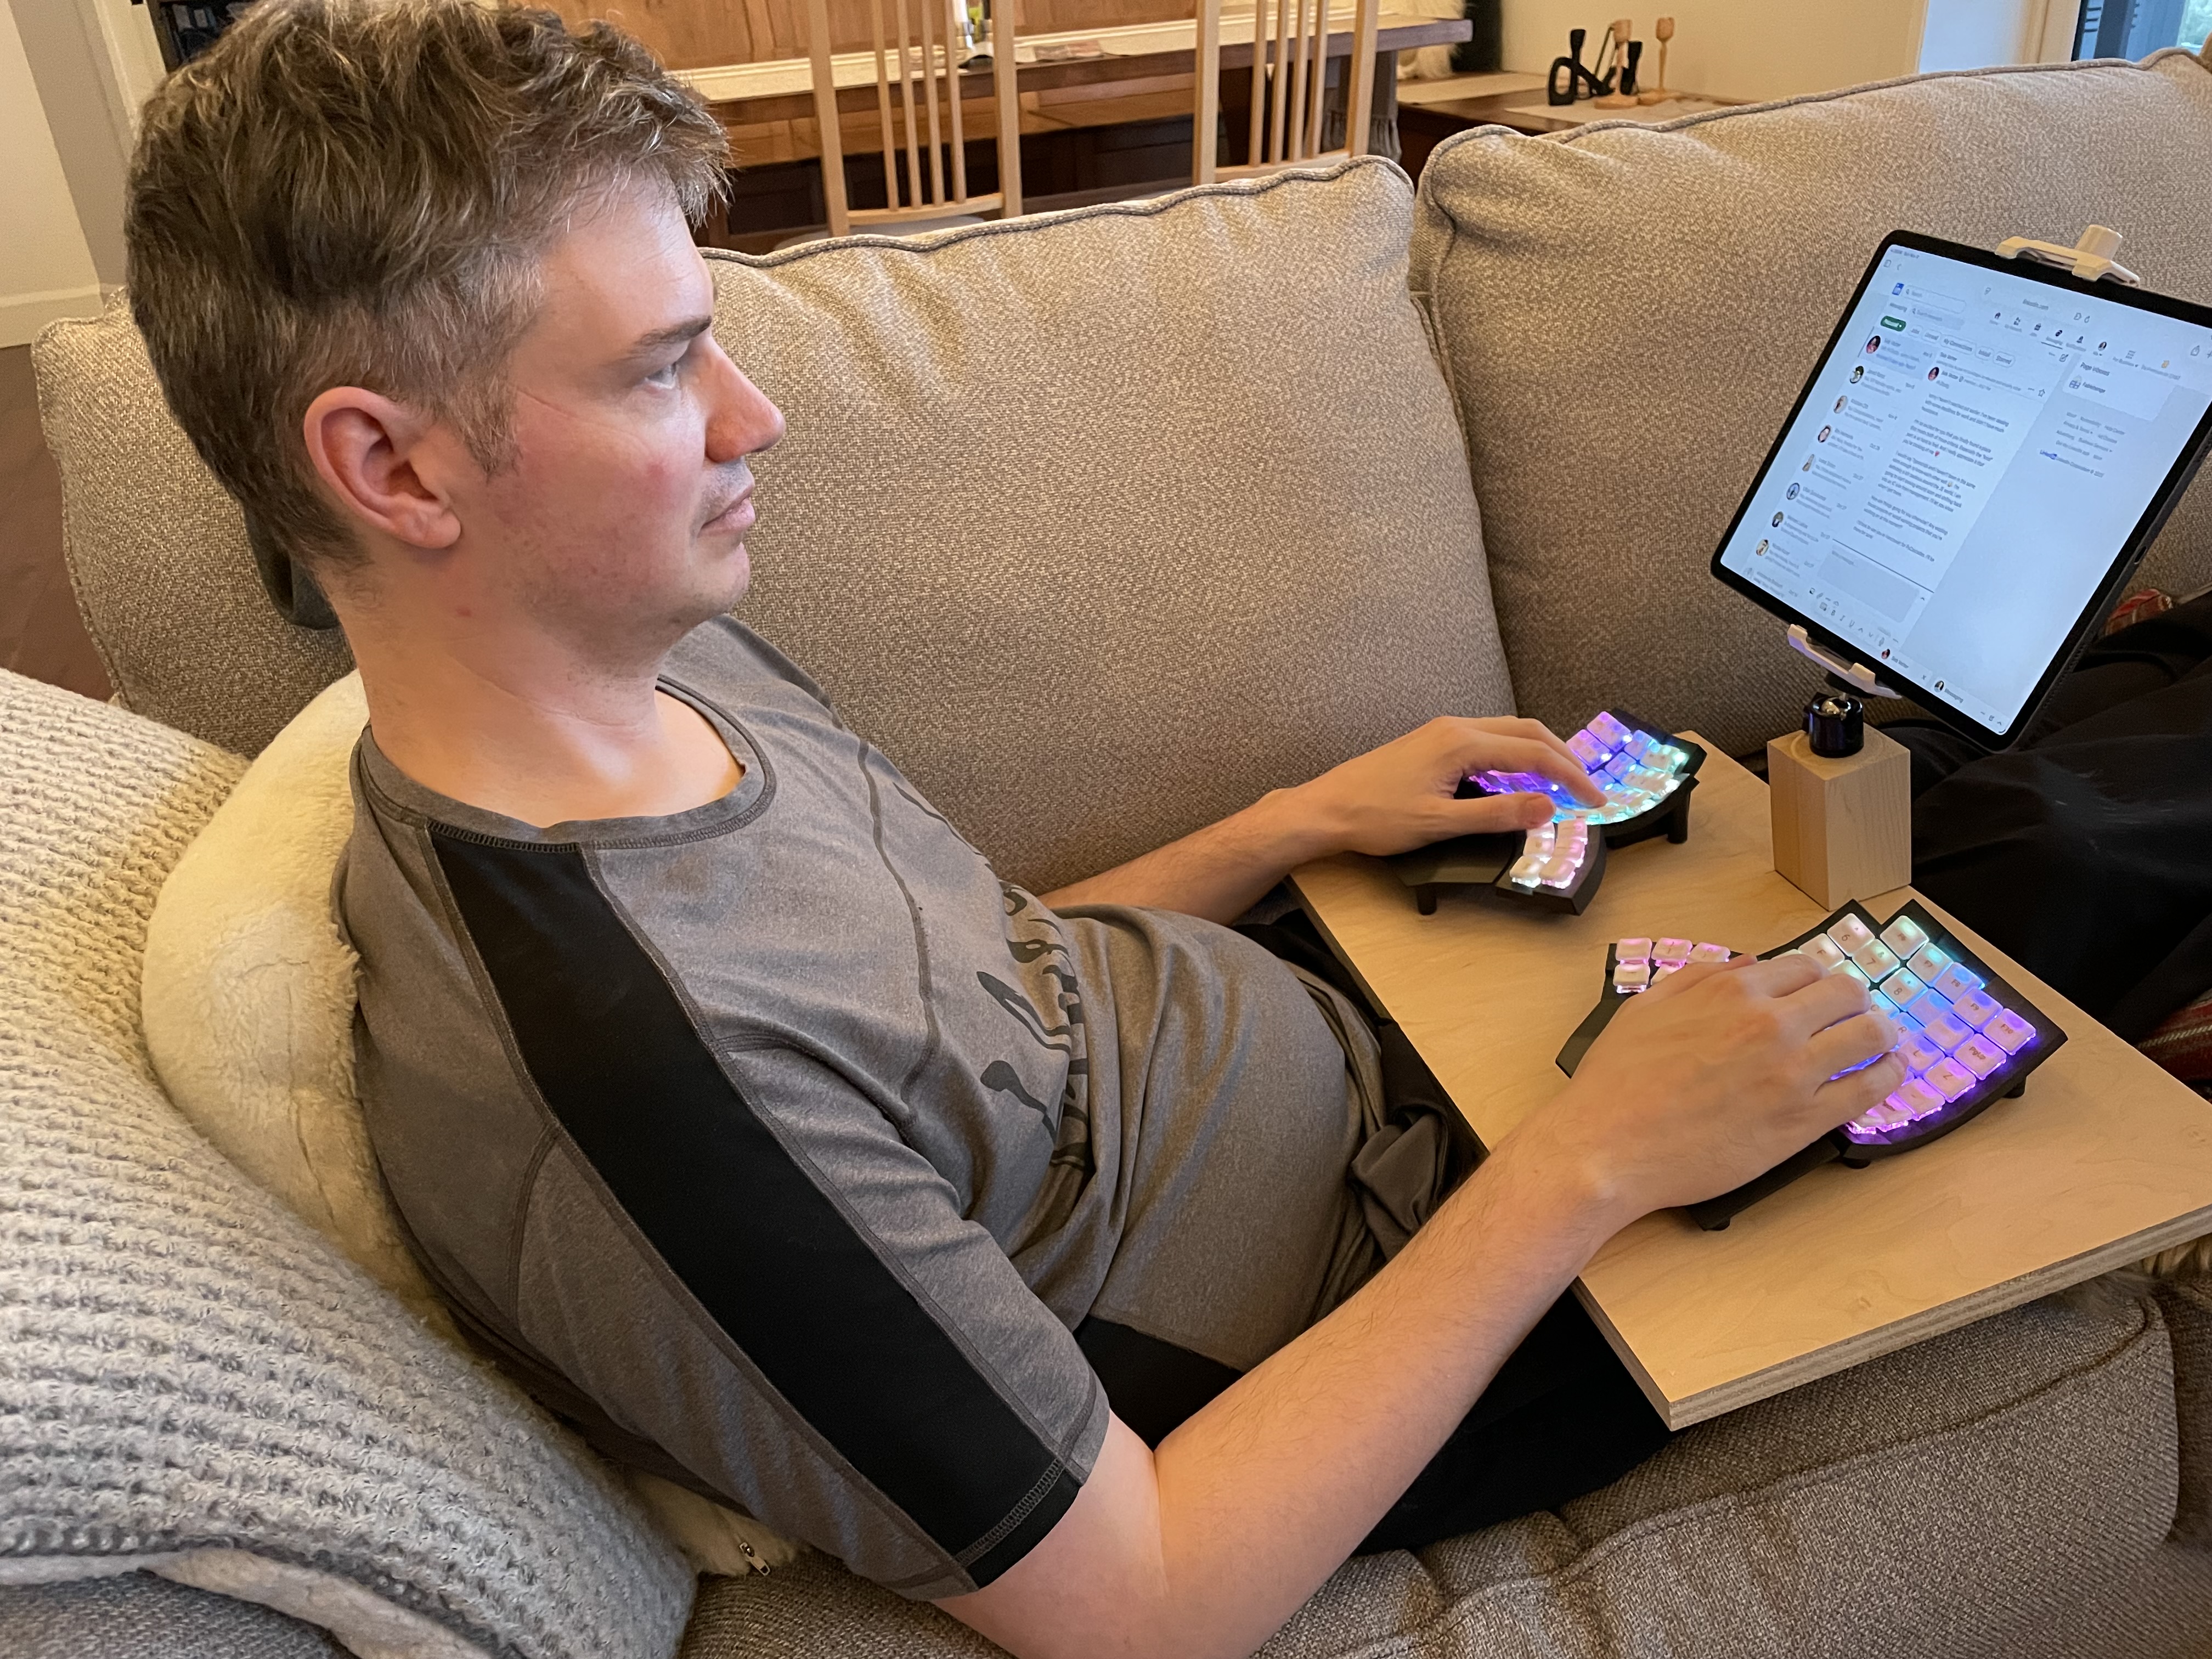
I was more than surprised at how well it worked. The ipad is connected over Airplay so the latency was a bit unreasonable, but other than that it was a very comfortable experience to lay on the couch and code after five years in a computer chair.
The idea worked but it wasn’t sufficient. The iPad is a bit too small and that latency is a bit too much. But I knew the idea would work well enough to justify making my next computer a Mac Studio.
I got it set up on my desk with my triple monitor setup (the old iMac is now a monitor thanks to Luna Display). I devoted way too high a percentage of my life to finding an appropriate portable monitor. The available wireless devices are all just too low a resolution so I resigned myself to being tethered like it’s 1999. I knew I wanted at least 16" and 4K resolution. After buying the Mac Studio I didn’t feel wealthy enough to also invest in an Espresso Display, but that is what I would recommend if you are feeling flush. I ended up grabbing a uPerfect 4K instead. It’s not great quality at all, but I got a terrific price on it so I’m satisfied.
Then I spent a couple full weekends in my woodshop making a new desk to fit the monitor. It turned out to be very simple:
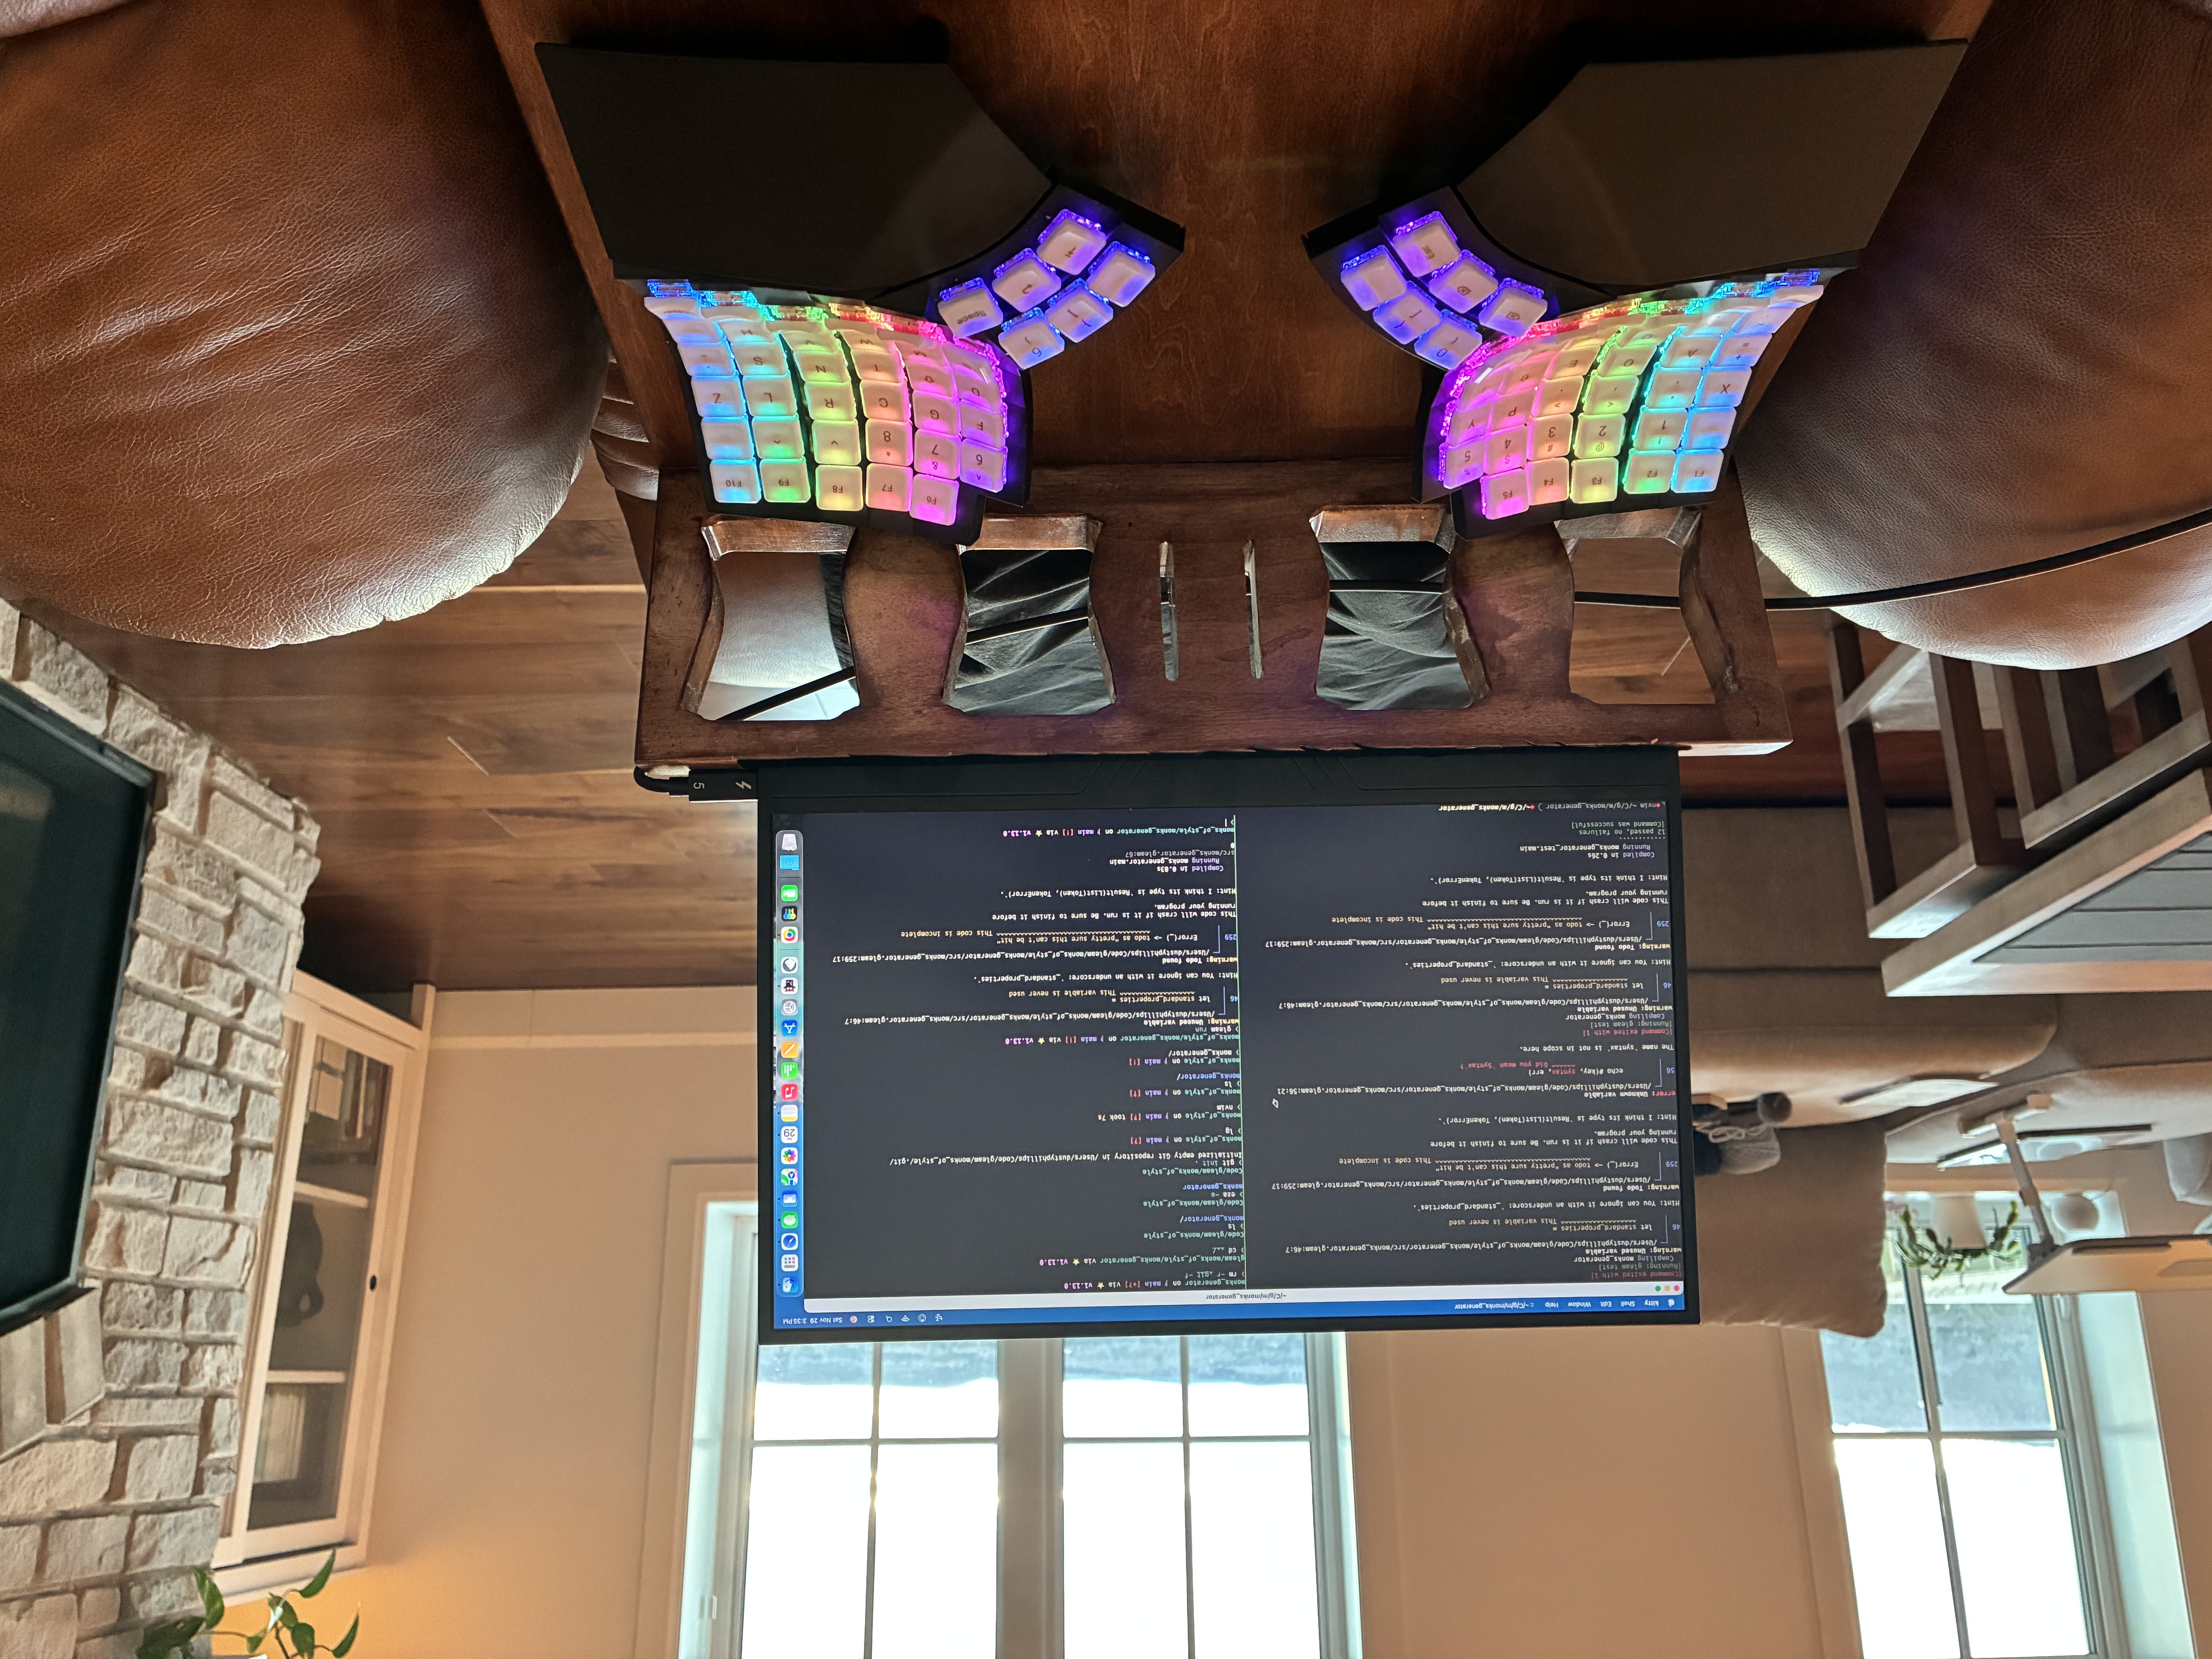
(That’s a MoErgo Glove 80 keyboard, by the way and I love it so much that I’m recommending it even without a referral link!)
The base is a torsion box to keep it light, and the back is solid maple with a groove routed into it to securely hold the monitor (more secure than it looks, at any rate). I put some flocking in the groove for decoration and to protect the monitor, though the latter would really only be necessary if it was a more valuable piece of equipment.
That complete, I needed a way to make the Mac Studio more portable. It’s an easy enough machine to carry, but unlike a laptop it doesn’t come with a battery. I was not keen on waiting for it to start up every time I wanted to move it from my desk to my chair or from my couch to my wife’s desk.
I solved this by finding the lightest battery powerful enough to drive the Mac studio. At the time, no such battery existed, but the Bluetti Elite 10 had just been announced and I pre-ordered it for delivery in mid December.
Together, the Mac Studio and Elite 10 weigh not far under four kilograms, so it’s not a “take it with you on a hike” or “walk across the city” kind of unit. But it’s perfectly adequate for wandering around my house. I tried putting the units on a rolling cart but it didn’t feel very secure, so I headed back to the woodshop:
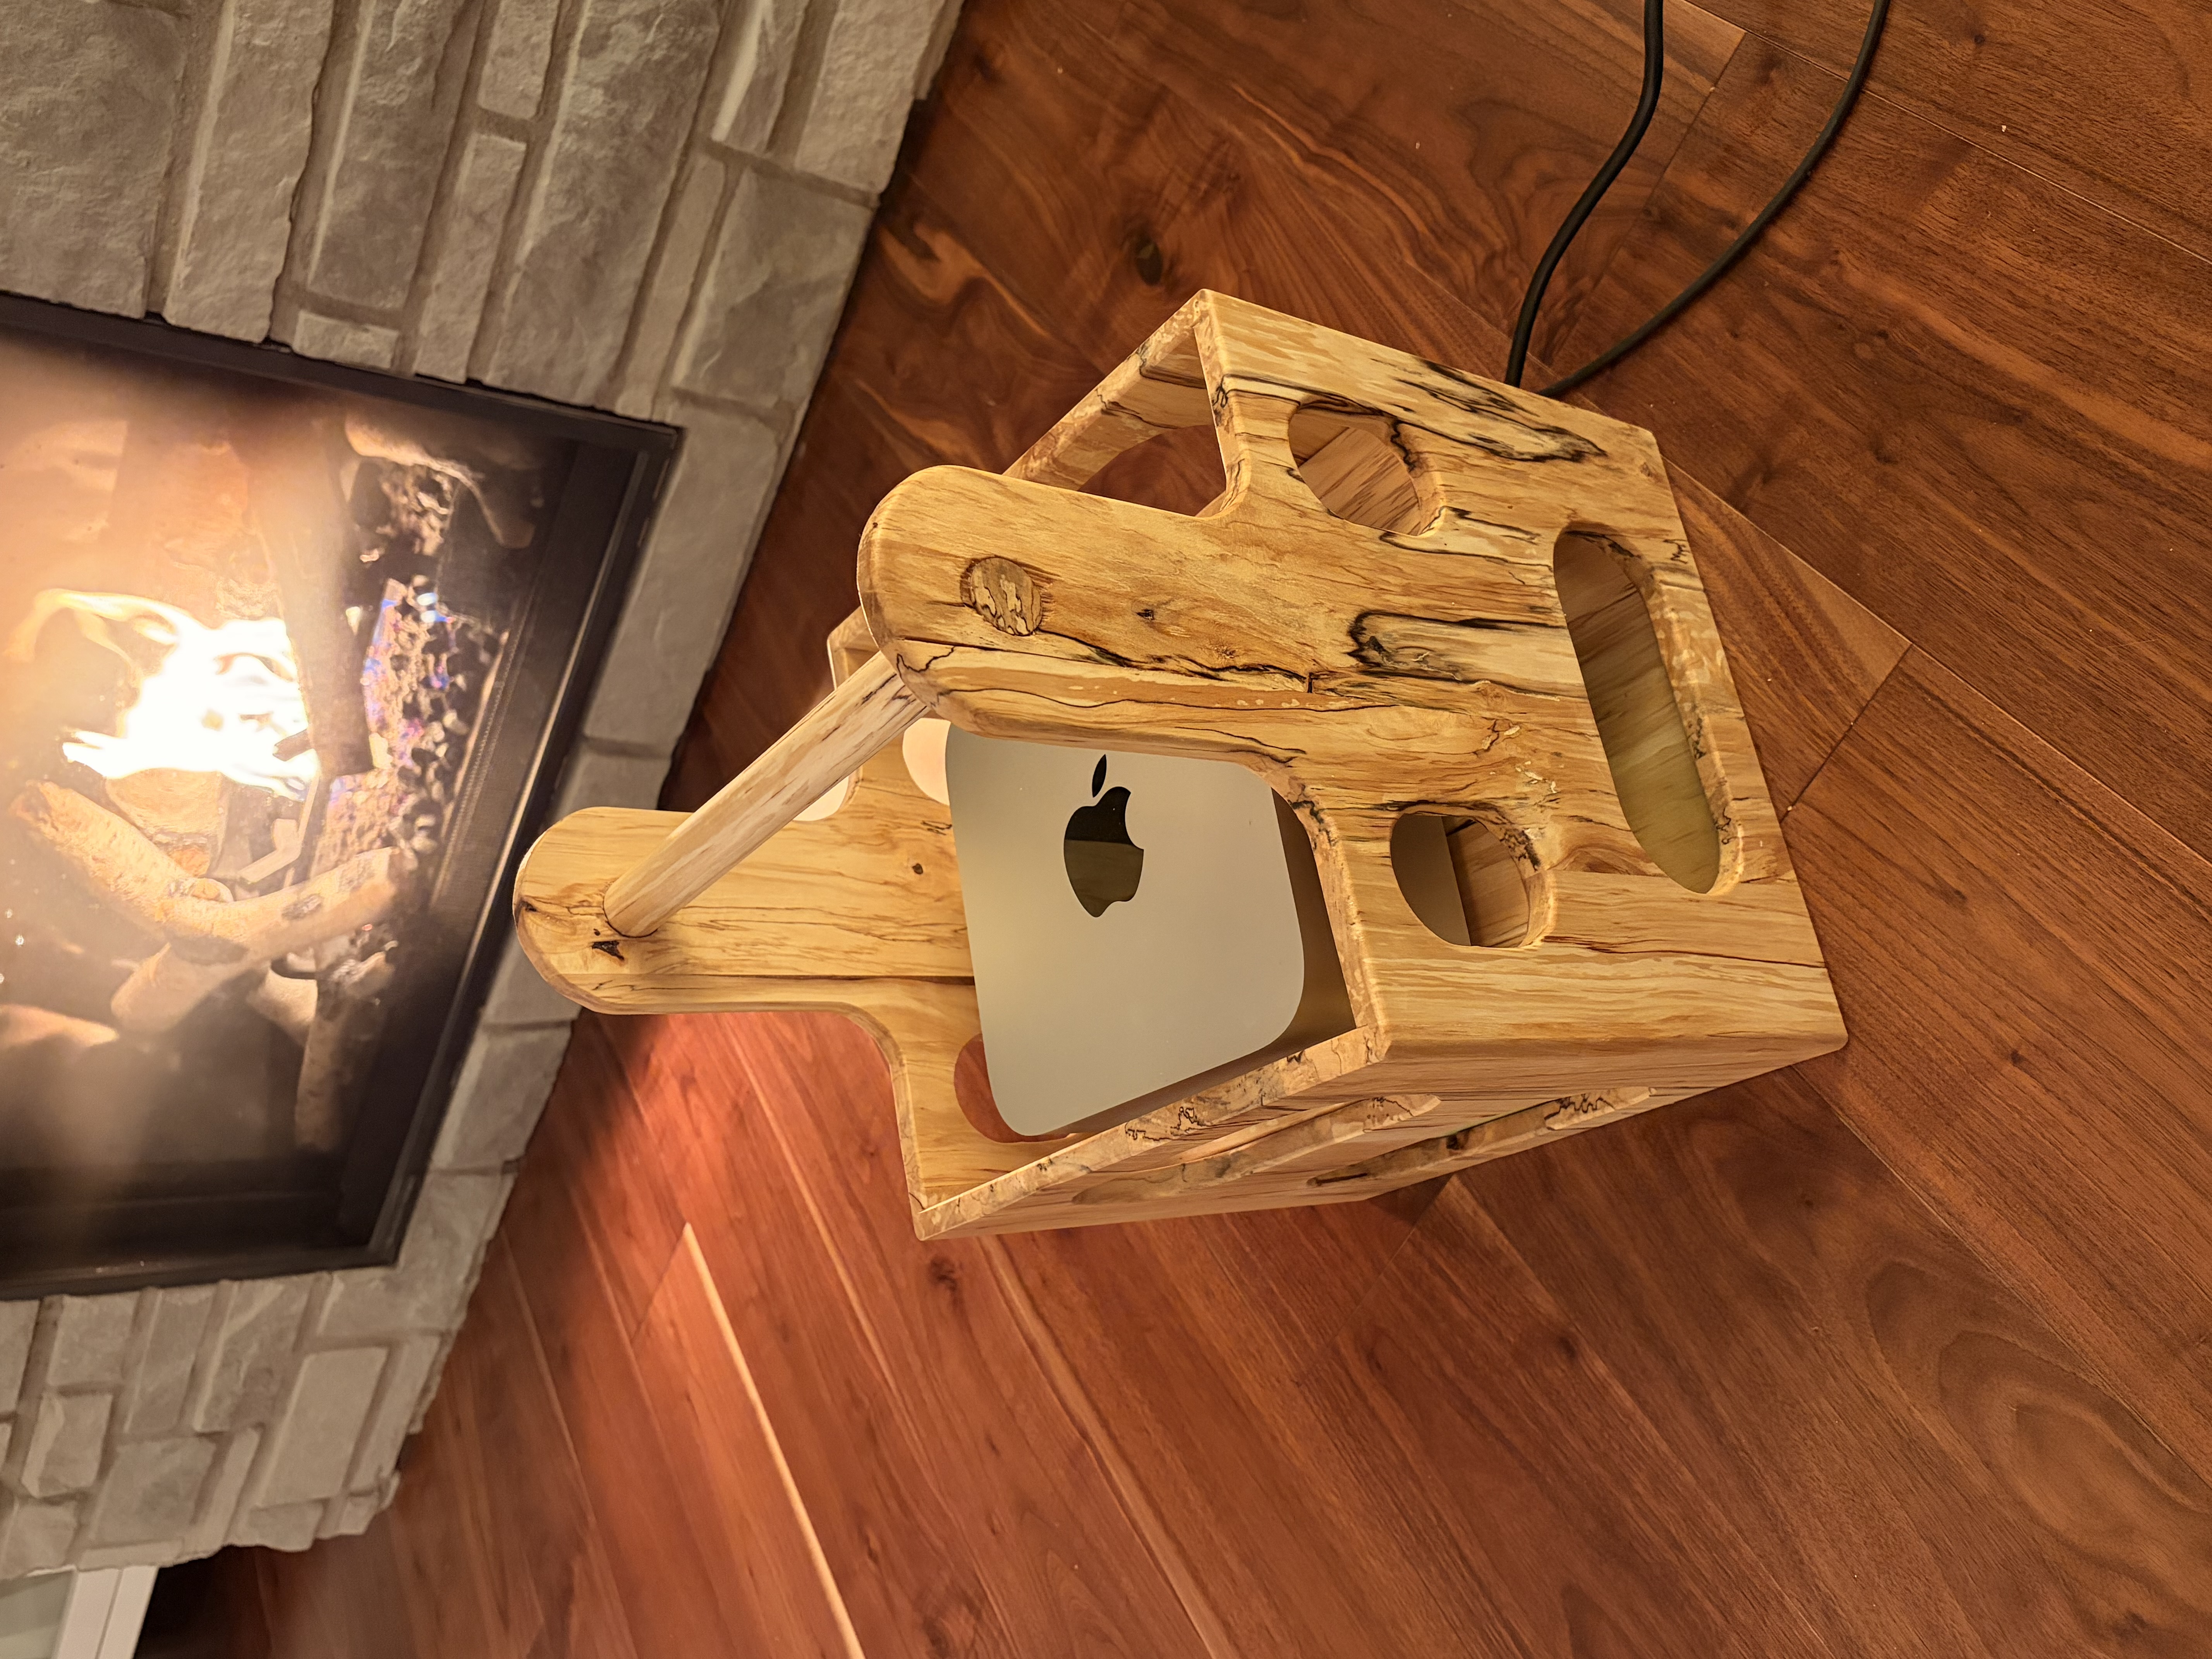
It’s not obvious from the image, but the box has two levels, with the Elite 10 on the lower level. I bought a super short mickey mouse profile power cord for the Mac Studio to connect it to the Elite 10 with no wasted slack taking up space and weight. The two cables coming out of the box are a Thunderbolt 4 cable to the monitor and the power cord for the Elite 10. I had to change some settings on the Elite 10 to put it into UPS mode, but other than that it was plug and play.
I don’t imagine this system will be useful for very many people since laptops work for most of you. But for those out there who want or have to use ergonomic keyboards, I wanted to share it.
Someone is going to ask what I’m using for a pointing device. I toyed with mouse emulation mode on my keyboard, but it’s kind of annoying as are the various “jump to screen coordinates” apps out there. At the moment, I’m using the same trackball I use at my desk (a Kensignton Slimblade pro). I have also backed the Proloring on Kickstarter and am feeling… slightly more optimistic that it will be useful than I usually am with Kickstarter projects. I’ll try to remember to update this once I receive it to indicate whether I can use it for my portable setup or not.
I apologize that this article looks like an AI generated Amazon referral link farm. I swear that wasn’t my intent… I just didn’t realize how much crap I bought to make this project work!
